Thursday, April 22, 2010

kitchen transitions and the traveling pots


There is more than one Liza lou in this smallish big world. And it seems we both have a love for kitchens. I may be able to whip up something in a kitchen, but she single-handedly made that kitchen from scratch. Completely out of beads. I can only imagine how big my smile would be if I had the chance to stand in the middle of it. My eyes would sparkle like those tiles I bet.

I have had plenty my share of kitchens. And in each one I have cooked up a storm. After my rents,  I've jumped from one kitchen to another in Raleigh, never leaving a minute outside of downtown. 

But it was across the street from the Golden Gate Bridge that I really started cooking, in my one room apt kitchen, that had it's own corner. I went to cooking school by day, and at night I cooked. I took the doors off the cabinets and painted them turquoise to match the one in Monica's kitchen on Friends. I'm not joking. (I'm laughing.)

My Friends kitchen on Alvarado St. in San Francisco

After that, there were two more to come on the west coast total, and one was in Canada. Canada eh!? Then across the country my pots and pans went, finding two kitchens in Carrboro, NC and one in Chapel Hill. A tree fell on the Chapel Hill kitchen, again I'm not joking.  So I packed up, and headed home to Raleigh. I found a tiny "one and a half Liza sized" kitchen on Hargett Street. I climbed on the sink to reach things, a Lazy Susan atop the fridge twirled my spices, and the oven was so small that even "Grandma" couldn't fit me in it. Cooking there was such a dance!


Now, the "nicest" kitchen I've ever cooked in was the one at my last apartment, the one that came after the tiny kitchen. Let's call it the Apartment Complex Kitchen.  But I hated, "extremely disliked" it.  The glass top stove made no sense to me at first, the cabinets were too tall to even reach on my stool, and there was only one corner to chop. I was always in the way, even in my own way.

So thank God for this kitchen. 


I may not have made it like Liza lou did, but I sure as heck will make this kitchen!

See a year ago I would of snubbed it. It's electric! There's no counter space. But, this is my new home, because really my home is in the kitchen. In the next few days I will be moving my pots and pans in. Let me get settled in and I will be back in about two weeks, and here's will I will be cooking. I guarantee I will be smiling, and I can't wait to share it all with you. And I'd say finding a jar of pickled okra in the pantry...is a very good sign!


Tuesday, April 13, 2010

much to say about apples


What you have, eat.


And I always have apples. Never granny smith. I guess I just don't care for the pucker, I actually dread a granny smith apple. Apples always come home with me from the grocery store. And I am one of those shoppers that touches them. Not just a simple pick up, but, I poke them. I'm laughing right now, at myself, I laugh at me, with me, with the best of em. So if one day, you find that you brought home an apple with a finger size dent mark, well, you can point your finger at me!

 The apple. It may not be as cool as the mango, as pop worthy as the grape, or as special as the peach.  But it is the forbidden fruit! The fruit of knowledge! And it's definite crunch-able and slice-able. Take your pick.


I do all sorts of things with apples. It's perfect for getting rid of morning breath with just one bite (try it), I've eaten the whole thing on more than one occasion, leaving the seeds and stem behind, and I day dream about making apple pies and apple sauce. But, I love the Braeburn. It has the most crunch. On any given day, sometimes for breakfast, sometimes as a midnight snack, you can catch me slicing it into quarters, leaving just the core. And I usually concoct some sort of peanut butter dip.

North Carolina has the best apples! On Sunday, I got a "peck" of apples at the Farmer's Market. I love lingo for all sorts of things, and as for apples, there are 4 pecks in a bushel. A bushel is 40lbs, meaning I got 10lbs of apples! They are for more than just apple and dip this time around. I'm using them for a very special occasion. One of my bestest friends Callie, her sister is getting married, and this Saturday night, I'm catering the reception. 


The brides to be love my apple popovers.


In black apron, 3 days, 180 popovers. 

Just like apple pickings, it's a labor of love I tell you. Popover love. Apple love. love. love. love.

These are best if made ahead of time, they bake better frozen, and keeps you sane the day you're serving them!

Ingredients:
(makes 32 popovers)

1 box puff pastry sheets (contains two), thaw according to instructions
4 apples of your choice, sliced into match sticks, then diced
1 bag shredded cheddar cheese, the finely shredded kind
1 branch rosemary, minced
1 t. honey
1 T mayo
tiny dash paprika
1/2 t. salt
pepper
small bowl with water

Method:
Thaw puff pastry according to instructions. I like to open the box and lay it on the counter, flipping it a few times til I can tell it's getting soft.

A little advice on cutting your apples (this is for you Kim and all the other go for it cooks out there!). Quarter the apples like I do, then cut those quarters into thin slices. Then take those slices and stack them into a pile about 4 high. Now, carefully cut them into thin sticks. You will have lots of them, aka matchsticks! Now line them all up and cut them into cubes. It's all about moving the apples around on the cutting board to get the cut you want.

Add the apples, cheese, rosemary, honey, mayo, paprika, salt, and pepper to a large bowl and mix well. WITH YOUR HANDS! Crunch it all up, get it nice and mixed.

When the dough is thawed, I like to sprinkle some flour on the counter so the dough doesn't stick. I roll the pastry sheet lightly with a rolling pin, just twice, one vertical roll and one horizontal roll. Then with a sharp knife slice the dough into 4 rows and 4 columns. If I explained that correctly you will have 16 squares to work with.


WITH YOUR HANDS again, take a tiny spoonful size of apple-cheddar mix and squeeze it in your palm. Place the tiny wad in the center of a dough square. With the small bowl of water, dip your index finger in and lightly rub the edge of two connecting sides of the square. Fold into a triangle and press down sides. Press edges with the tip of a fork. Viola! Done. Lay on parchment paper or a baking pan or casserole dish. 


Repeat. Repeat. Repeat. Repeat. Repeat. Repeat. Repeat. Repeat. etc. Then wrap with saran wrap and freeze til ready to serve. Prob not much longer than two weeks. 


Cook at 400 degrees for 12-15 minutes. Take a peek at twelve. Should be golden brown with cheese dripping out the sides.


Thursday, April 8, 2010

this week's box

It's been kinda a long week for me. The kind where you notice the minutes in the day. Has it felt the same for you?  Maybe it's been that blanket of pollen and the wait for it's washout.

Aside from making pollen bombs, which I can't give you too much more information about over the blog site, I did something new.

For the past few days, I've been doing my usual, and everyone that saw me would probably agree. But in the midst of my routine, something out of the ordinary happened...

A friend of mine turned me on to this website, US Wellness Meats. Now, if you haven't noticed already by reading my blog, I love meat. And the idea of it arriving as a package just for me...I started clicking away! It started with just a beef stick. It looked way too interesting to pass up. I mean, come on it's like a meat power bar. A meat power bar! But they wouldn't let me check out until my shopping cart had reached 7lbs! So I added a lb of butter and 2 salami sticks. Still not heavy enough. I clicked snacked sticks, and beef bones. And after 6 of those "power bars", I made it!

So this week, I woke up to my alarm, I set my alarm again, I worked, worked, worked, I cooked, cooked, cooked, I weighed out hundreds of things in my head. But none of them were as much accomplished and exciting as the 7lb box of meat that was on my door step Wednesday afternoon.

(this is a reenactment)

Looking back, it stands out greater than those long minutes. Happiness in a box, delivered to me.
Oh and when it arrived, you know I had a bite of everything, minus the bones. But not minus the butter!

What would your happiness in a box, the highlight of a long week, be?

Sunday, April 4, 2010

the real kind


Happy Easter.


     (left: the handsome boy is my brother, Adam, and right: me and my big sister, Katie)

And that baby there, with the precious cheeks. That's my little sister Tessa. It's funny though, I never think of her that way. She has more height than I could ever dream of, and a boldness, that makes her stand out from all the rest. The last of four, then six, to grow up, but the first to be herself. Anyone that knows her, understands. If you don't really know Tessa, and just briefly caught a glimpse, you may have misjudged her, unaware of what she is capable of. To me, she is daring. She says yes to the unknown.  A week ago, half joking-half serious, I sent her a text asking her to make homemade Cadbury eggs.

And what did she do... 


She made them!

So this post is a special one. We are celebrating Easter. We are celebrating family. And we are celebrating this, with real treats. Not the cr*p you find at the drug store. When you make something homemade, not only do you know what's in it, but you get an experience that is just for you. And sometimes, it makes you feel a little bold, daring. Now, we can only wish that we could experience Tessa's homemade Cadbury eggs. But what an Easter to know that they were made! And by a sister, that I am lucky to have...and Brooklyn, you're lucky too!

When I was that little girl in the hat, Cadbury eggs were my absolute favorite. Now thanks to Tess we can make em' ourselves...


Ingredients:

1/2 cup light corn syrup
1/4 cup butter, softened
1 t. vanilla
1/4 t. salt
3 cups powdered sugar
yellow food coloring
red food coloring
1-12 oz bag of milk chocolate chips
2 T. shortening

Method:

Combine corn syrup, butter, vanilla, and salt in a bowl. Mix with an electric mixer until it looks creamy. Then add sugar by hand, one cup at a time, continue to mix.


Separate filling into 2 or 3 (she made three different colors) different bowls and add  few drops of yellow and red food coloring to one bowl and add just yellow to the other, one drop at a time. Mix together til color is even, then cover and chill in fridge for up to two hours.


When filling is firm, roll a small ball from each bowl and then roll them together to form one egg shaped ball. Lay on shortening brushed sheet pan, and repeat with rest of the filling. Refrigerate for 3-4 hours.


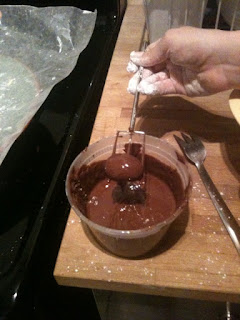
Once firm, combine chocolate chips in glass bowl with 2 T. shortening and microwave on high for 1 minute. Then stir and microwave another minute. Stir again til smooth. Use a fork to dip each "egg center" into the chocolate. Place candy on parchment paper to dry, once dry, dip again.


Ready to chill and ready to eat! What an Easter egg.